Photo Transfer: Remembering a Beautiful Wedding
March 5, 2012
For those of us (Maria and myself included) who didn’t waste any time starting a family after getting married, the wedding itself can quickly start to seem far, far away. I was just married in August of 2010, but since our first child came amount exactly 9 months later, the wedding already feels like a distant memory.
Now, I feel quite strongly that our society has made weddings into way too big of a deal (and an expense). But, as wives our wedding day was an important, sacred day. It was the day that I entered into this crazy vocation where I chose freely to give myself completely to my spouse and my family. And it is important somedays that I remember that this is something I did freely choose!
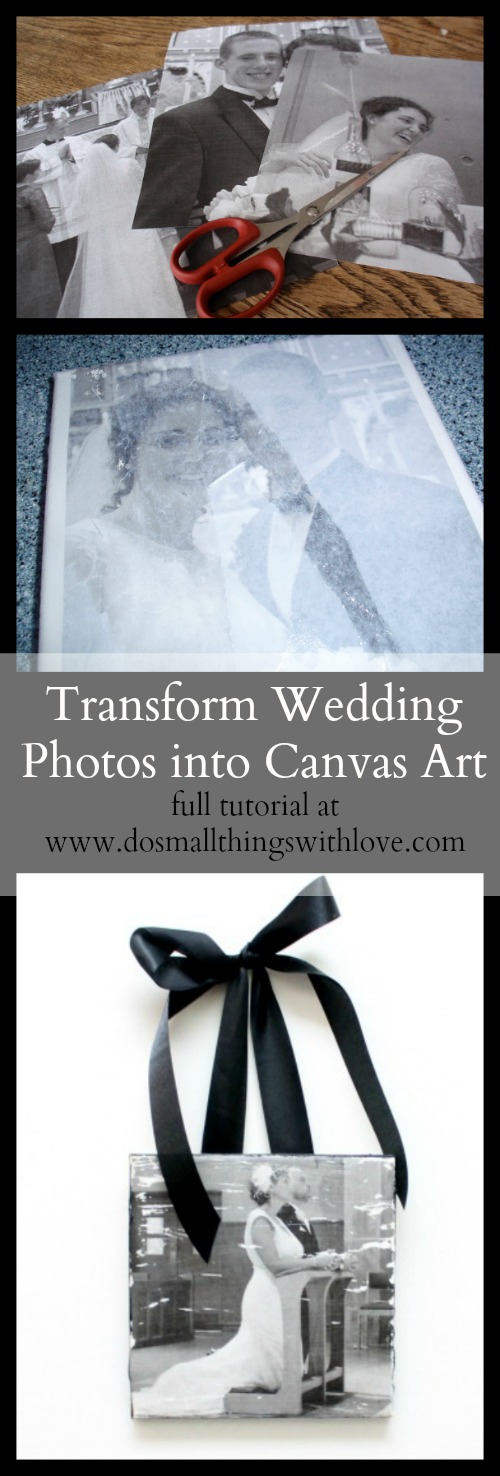
Therefore, I embarked on this project because I really didn’t have many pictures of my wedding around the house (and my sister, who had been married 3 years longer that me, only had one picture of her wedding that had been printed on a computer!). There are many photo transfer tutorials on-line. This one uses canvases and creates an old-timey look which I really like.
Supplies:
Canvases
Wedding Pictures printed on a printer on regular paper
Spray bottle
Black acrylic paint.
Step 1: Cut pictures to the same size as the canvas
Step 2: Apply a generous coat of transfer gel to the canvas
Step 3: Press the picture, face down, into the transfer gel. Rub to get rid of as many wrinkles and air bubbles as possible. The finished canvas will be a mirror image of the original picture.
Step 4: After the canvases have dried overnight, spray with water and begin the slow process of rubbing off the paper. Be gentle, but also be aware that this is a PROCESS and will take lots of rubbing to get all the little paper bits off. I started with just rubbing with my finger tips, and got the last bits of paper off using an old toothbrush. Below are a few pictures of the canvases mid step 4. Once all the paper has been removed the image will show clearly.
Step 5: After all the paper bits are removed, add another coat of transfer gel, and use back acrylic paint to paint the edges. Finally, I used big black ribbon to hang mine from the wall which I attached to the back of the canvas with a hot glue gun.
Here are a few close-ups of the ones I made for myself. As you can see, the transfer will not be perfect, but I think the result is a wonderfully classic look.
This is a simple projects that helps me remember the beautiful day of my wedding and how lucky I am that God had prepared such a perfect vocation for me.

In Christ,
Nancy


[…] have done several photo transfers (here, here, here and here), but I wanted to do something a bit different, so I made this lovely swinging couple into […]
[…] case you’ve missed it, I’ve already transferred photos onto canvas, fabric, wood and glass. I also did a reverse photo transfer with watercolor. I love all of […]
[…] also had fun transferring my own wedding photos, and a wedding photo of my parents. I just love how creative you can get with photo […]
[…] How to Transfer a Photo onto Canvas […]
I am in love with this idea. Thank you so much.
[…] is one of my favorite, favorite things. I have done image transfer many times, onto wood, canvas and fabric, but this is the first time I attempted to do it onto glass. I love how this project […]
This is such a beautiful idea. Happy belated anniversary!
I just wanted to stop by and say Thank you for linking up to “Home is Where the Heart is” Our link party is a great one because of you! We’d love to have you link up this week too! The party is open now! http://www.homesteadsimple.com/home-is-where-the-heart-is-link-it-up-wednesdays-4/
PS.
You’ve been featured! 🙂
Those are really beautiful!