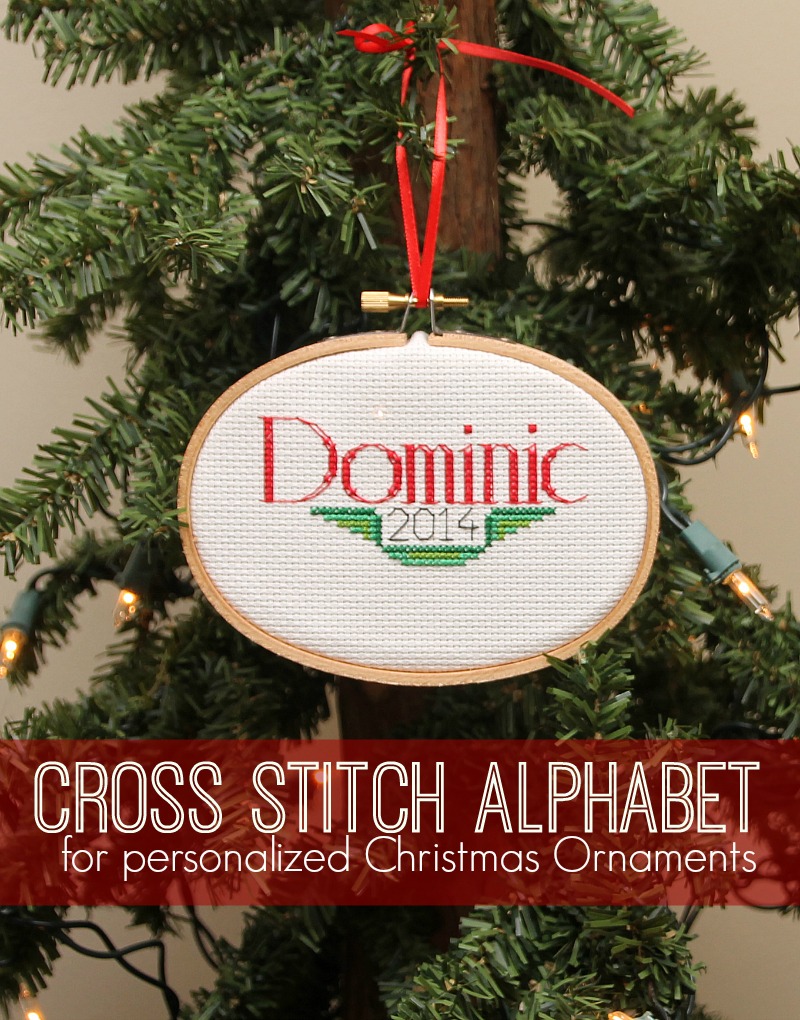
FREE Cross Stitch Alphabet for Personalized Christmas Ornaments
December 12, 2014
I’m a stitcher and terribly nostalgic–which is why I created this free cross stitch alphabet for making personalized Christmas Ornaments.
I think I might be most nostalgic at Christmas Time (but aren’t we all?).
When we set up the Christmas tree every year I like to look at each and every ornament and remember when we got it, and why we got it.
On our tree we have marked all of the major events in our lives together–marriage, buying a house, and, of course, the birth of each of our children.
Another little bundle joyed our crew this summer and I just had to find a way to mark his birth in a very special way.
And, with me, if I want to make something special then I have to stitch it!
Here’s what I came up with:

Here is how you actually create your personalized ornament with this cross-stitch alphabet.
Supplies needed to make your own cross stitch alphabet ornament:
- Aida Cloth (Cross Stitch Cloth)
- Free Cross Stitch Alphabet Pattern
- 3 x 5 Embroidery Hoop
- Embroidery Thread–Greens
- Embroidery Thread–Reds
- Ribbon
The free Cross Stitch Alphabet is below.
Click on the image to enlarge and print.
It’s kind of a cool cross stitch font, right?
I like that it is fancy, but still readable because if I am going to put all the work into cross-stitching something it better be readable!
This cross stitch alphabet combines cross stitches and back stitches.
On the chart above the two are shown in different colors, but I did that mostly so that it was easier to read (I guess I got a thing about readability ;)).
When stitching this up I recommend doing the cross stitches and back stitches in the same color–but if you want to mix it up, feel free to use different colors if you’d like!
Even if you use the same color, make sure to use 2 threads for the cross stitches and only 1 thread for the long back stitches.
Because we love to add dates to ornaments I also included numerals on the pattern.
I used these numbers to fill in the very simple pattern below.
The date in these green lines is intended to be centered and below the name on your ornament.
First, you need to print out a BLANK CROSS STITCH GRID like this one.
Once you have it printed, grab the cross stitch alphabet pattern and chart out the name you will be stitching.
Leave just one blank row between each letter.
I think this is easier to do if you use different colors for your cross stitches and your back stitches.
When you have the name charted out, mark the center.
From the center, you will then be able to tell where to stitch the bottom details for your ornament.
Since I am lazy I only drew out the top line of the bottom details.
A note here, if your date is “2011” you won’t need as many rows in the bottom details as I did for “2014” so you will need to remove a few rows.
Make sure to take the rows out of the center to keep the whole thing symmetrical.
Just a quick note about stitching up this font.
For cross stitch in general, it is important to always do the cross stitches first, and then go back and do the back stitches.
This is also a matter of convenience since you will use 2 threads for the cross stitches and only 1 for the back stitches.
Here is what my ornament looked like when I completed the cross stitches for the name.
After this, I went back and did the backstitch details with only 1 thread.
And remember, it’s called counted cross stitch for a reason! Count carefully!
Once your stitching is done, throw it in an embroidery hoop and tie a pretty ribbon through the top–and ta-da!
It’s not just an embroidery hoop any longer–it’s an ornament!
These 3 x 5 embroidery hoops are perfect for ornaments.
They are small and yet offer plenty of room for most names–even silly, old, long names like the ones I have given my kids!
I hope your holiday prep brings you loads of joy!

Thanks,
Nancy
Hi, when I click on the link to download the font it says file not found. Can you send it to me as a pdf? Thanks
I LOVE your alphabet. Try as I might, I cannot design an “&” symbol for a wedding sampler I am stitching. Would you be able to help me? Thank you so kindly,
Claire
Hi! I love the alphabet, the letters are really cool but I have a problem with the “v”, can you please help me?
What problem are you having exactly? I know it looks a little odd, with the diagonal line.