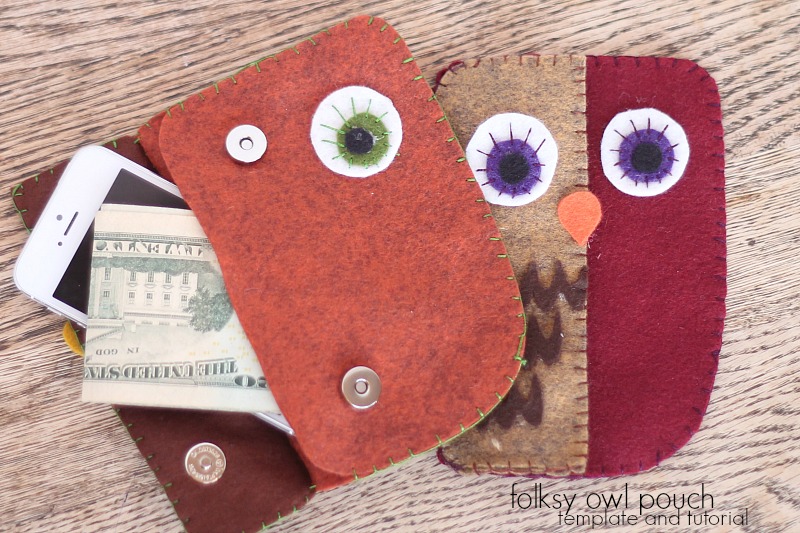
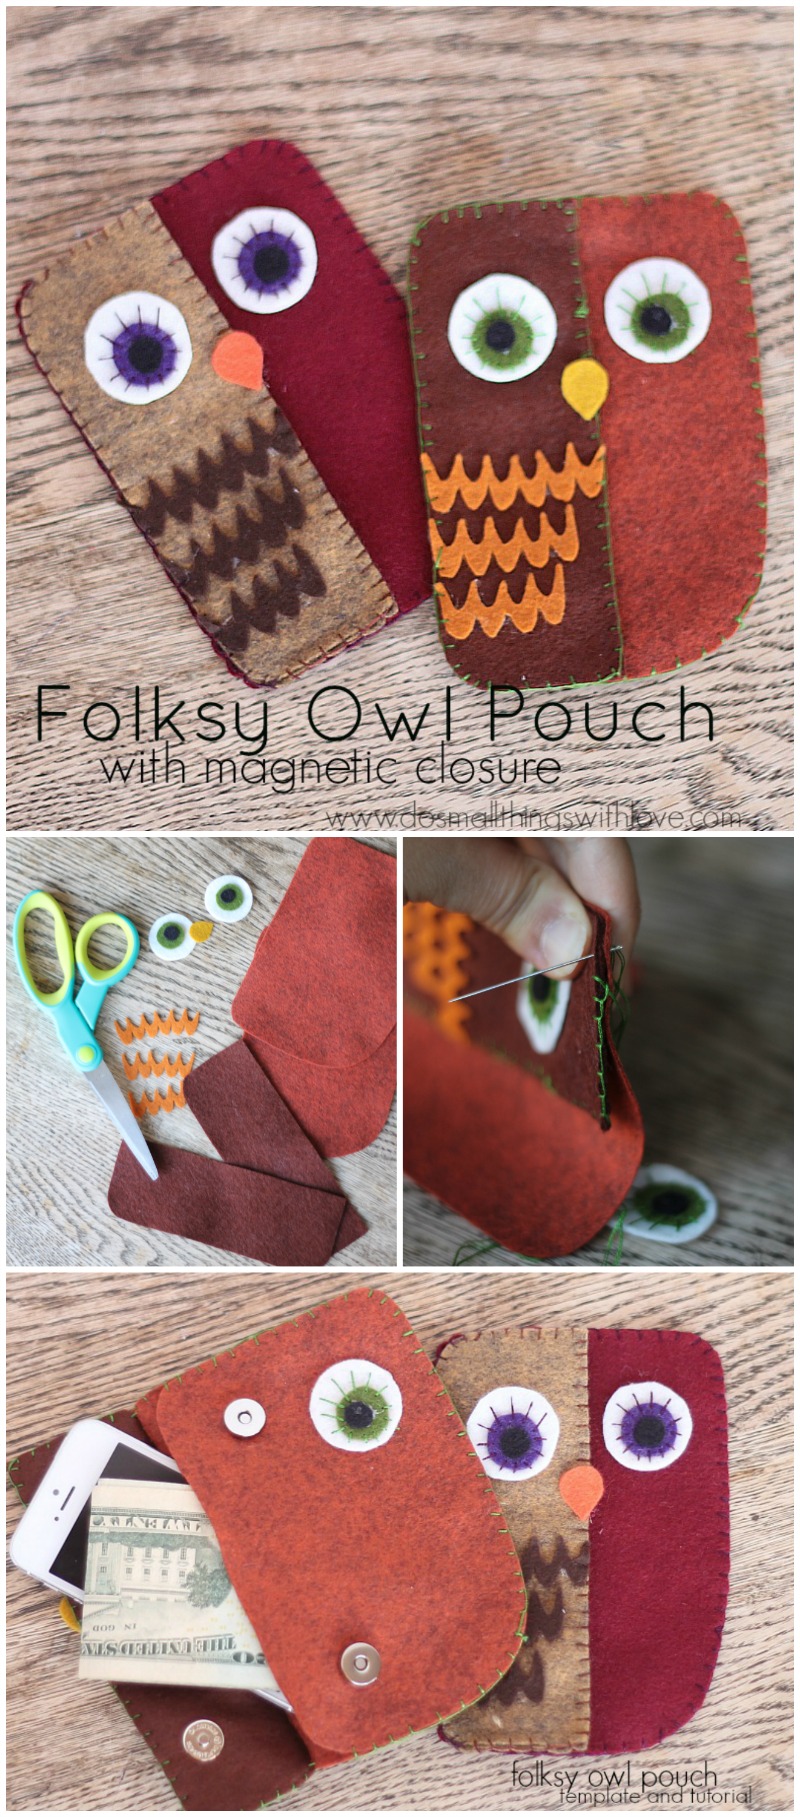
Folksy Owl Pouch

While naming this project I realized that I have made a lot of owl purse things.
Like, I have these felt owl coin purses, this felt owl coin purse with hidden closure, this felt owl pouch, and these felt owl iPod cases.
Notice a trend?
But, all of these previous projects should not be confused with what I am sharing with you today: Folksy Owl Pouch.
This pouch is different than any other pouch I have previously posted.
Sure, it is also made of felt and it also has a free template and it also is an adorable owl.
But, this one has a strong and sturdy magnetic closure.
And, it is designed to be the perfect size for a phone and a few other essentials.
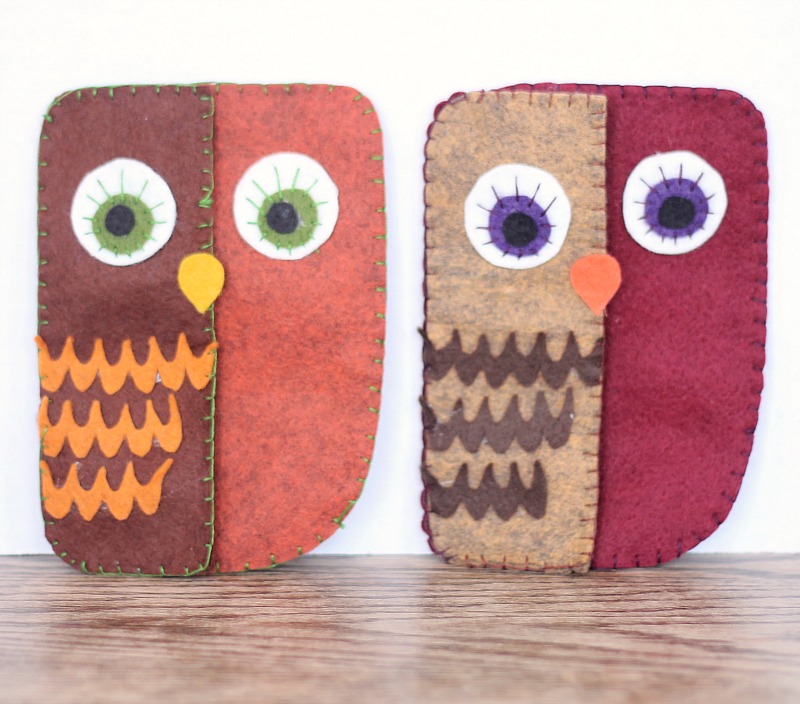
And, these are adorably folksy. I love folksy–especially folksy owls!
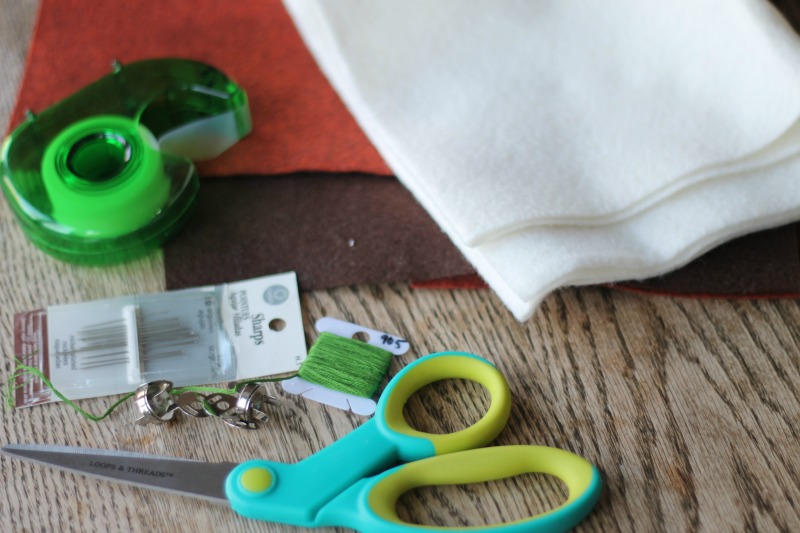
And, since I know you are dying to make your own folksy owl pouch, here is what you will need:
- Template printed on regular paper
- Clear Tape
- Siccors
- Felt in desired colors (I use a wool blend I purchase from BenzieDesign. So many beautiful colors–and a great price)
- Permanent Fabric Glue
- 2 Magnet Closures. (I used these)
- Embroidery Thread and Needle
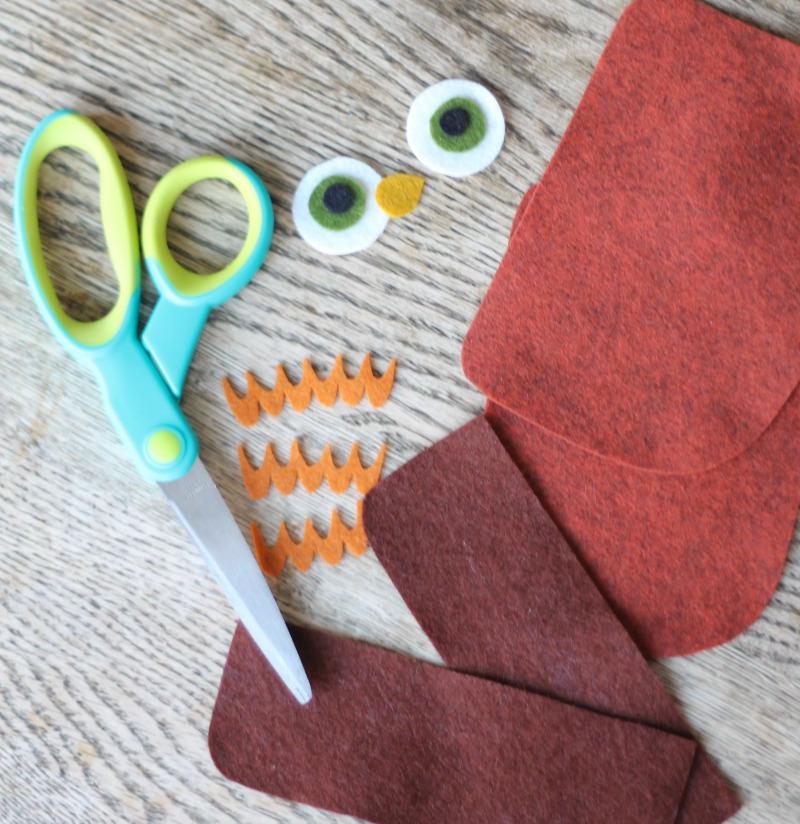
As a first step, use the template to cut out the pieces you will need.
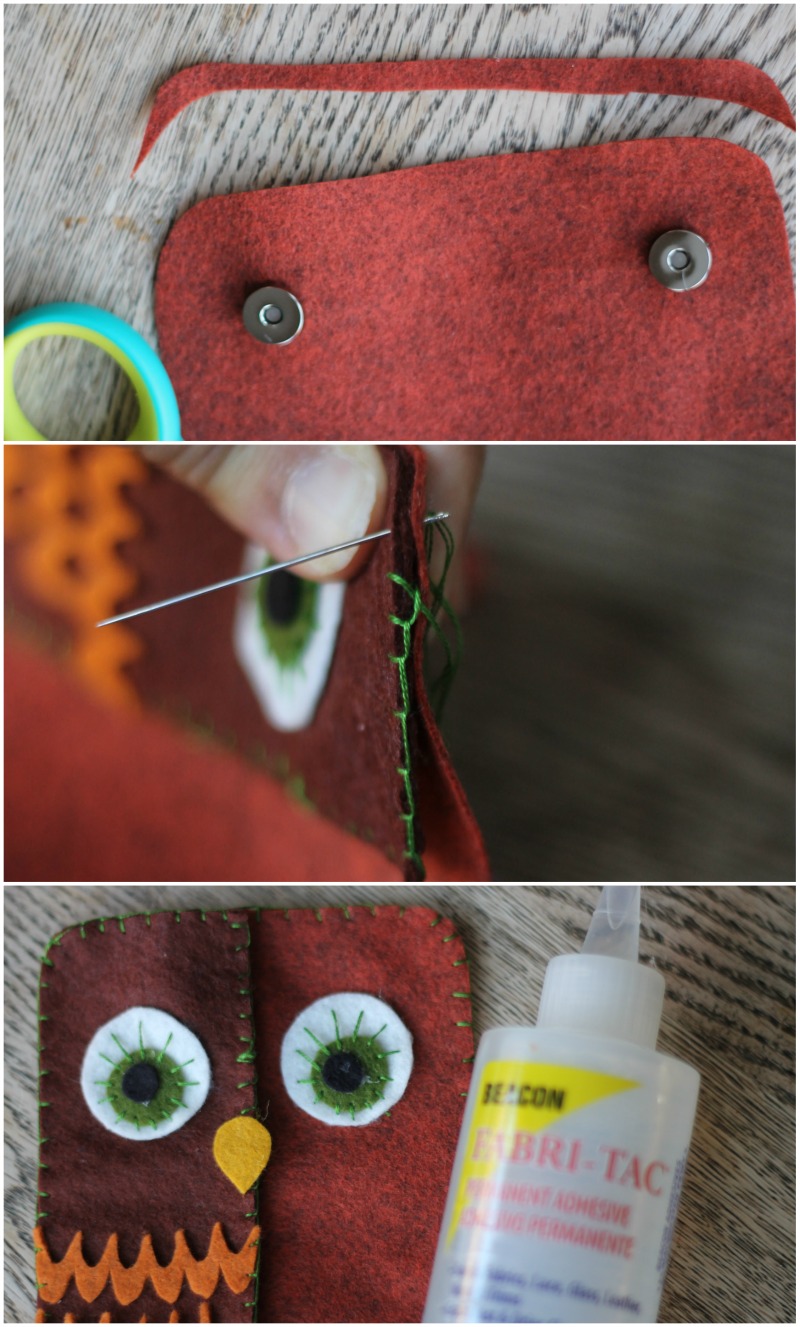
Pay attention to the special instructions for cutting the body (2 the full size, and 2 pieces that are 1/2 of the body–see picture below).
To get precise, beautiful cuts use a very sharp pair of scissors and clear tape.
Do not use a pin as this will cause your pattern to bubble.
Simply tape the patter directly to the felt and cut around it.
After you have the pieces cut, here are the steps for putting together your folksy owl pouch.
It is important to do these steps in order!
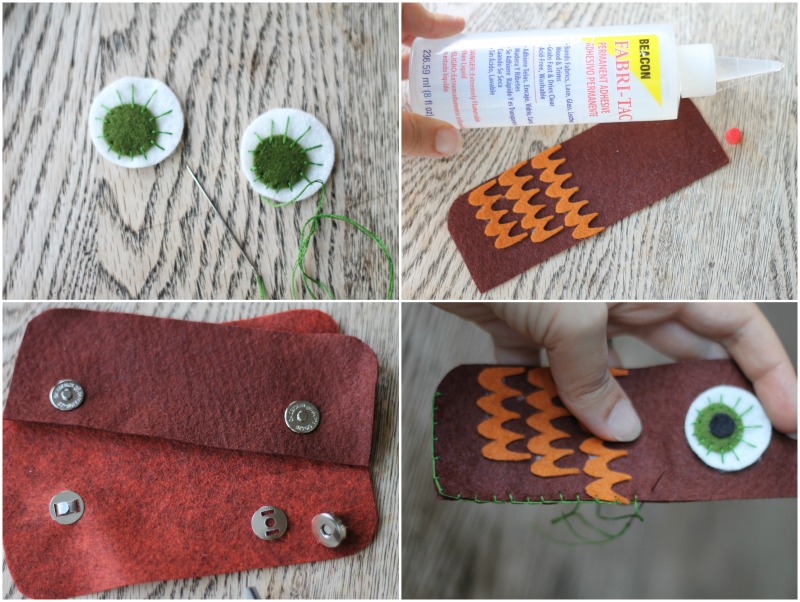
- Sew the 3 pieces of the eyes together. I added some longer stitch details and glues on the black center.
- Glue down the feather details, longer pieces on top. These should be glued to the 1/2 body piece that you cut.
- Put in your magnetic closures, as pictured below. 2 will go into one of the bigger body pieces and 2 will go into one of the 1/2 body pieces. While you do this make sure to line up the closure ends–and make sure they are at the bottom of the flap
- Place both 1/2 body pieces together and stitch around 3 sides: short sides and the side with the straight corners.
5. Now it is time to start making this look like a pouch! Line up the clasp sides and trim if necessary. You are trimming this because it will be the inside of the pouch and you don’t want this sown into the top hem.
6. Layer the pieces as follows: 1/2 body pieces (both should be stitched together already), then the full body piece with the clasp, and then the blank full body piece. Connect the claps. Then, blanket stitch all the way around–making sure to stitch through the 1/2 body flap and the back piece on the left side, and then only through the 2 full body pieces on all three other sides.
7. As a final step, glue down the beak and eyes.
And there you have it. There are so many folksy owls!
I hope this doesn’t sound too complicated.
Take your time and think about how the pieces need to be layered and it will turn out just fine!
 Thanks for being here!

this is really cute. Just made it this snowy afternoon and want to make more now! I didn’t have magnetic closures, so I used snaps. Hope they hold up. Thanks for the pattern.
I love it when people tell me they’ve used my patterns! You just made my day!
[…] Folksy Owl Pouch from Do Small Things with Love […]