How to Bind a Felt Book (2 Ways)
March 6, 2015
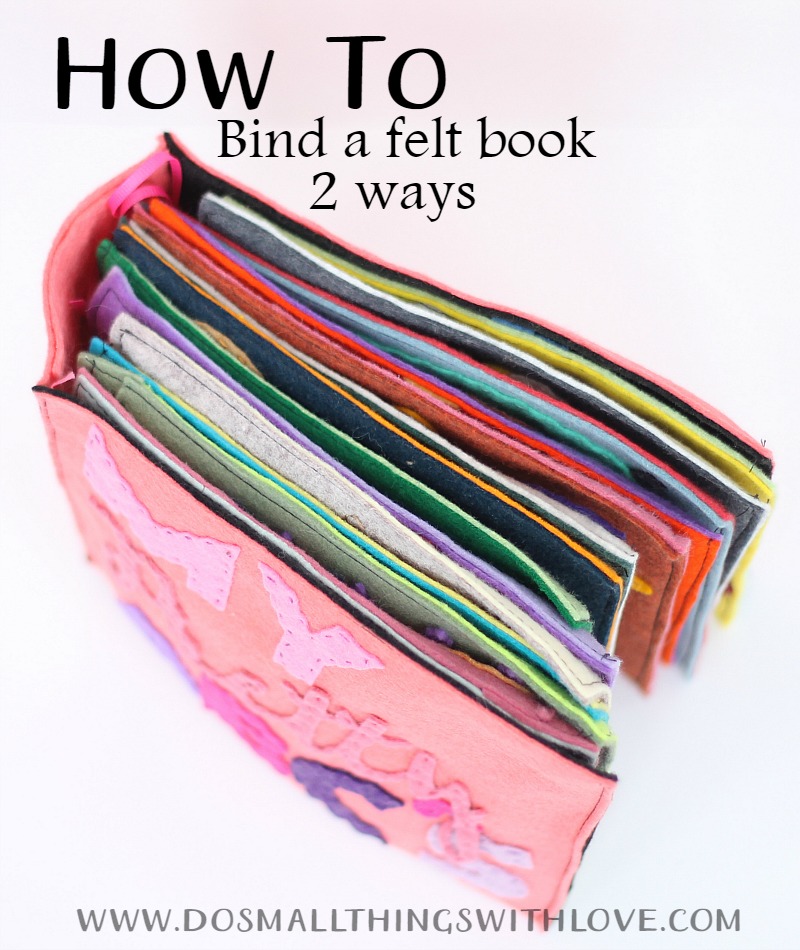
Hello Friends!
Today we will be talking about how to bind a felt book and the 2 methods I use to do this.
I have been working hard (and actually getting up early in the morning to make time) to complete a big project that I will be launching (yes, launching and not just posting) next week.
I can’t wait!
As you can see from the pictures, the project is something I’m calling “My Pretty ABC’s” and it’s a girly felt alphabet book. (PS–pattern is now available!)
I’ve worked so hard on this book and the patterns for it.
I’m just so pleased with it I could squeal!
But, more on that later.
For now, I want to talk about binding felt books.
I will be sharing 2 methods that I use for binding my books–the method I used for this project and the method I used for my Rosary Quiet Books, which in the end were a more slender book.
First off, before we get to the 2 methods.
Here is how to prepare the pages to be bond.
Supplies:
- Felt for backing
- Sewing Machine
- Eyelets and Eyelet Pliers*

Once your pages are fully stitched, it is time to put a backing on them or stitch them back to back–just so that the backs of your stitching aren’t showing.
For the Rosary Quiet Book, I decided to add a piece of black felt to the back of each page, but for “My Pretty Alphabet” book I decided to skip the backing and just sew the pages themselves back to back since it was so many pages long.
Either way, head to the sewing machine, place the pages together, right sides out, and sew on the very edge of each page, on all four sides.
Because finding a matching thread for each piece would be total madness, I used black thread for each page.
When the sewing was complete, I trimmed the edges.
You can skip this step if you are able to sew and cut perfectly straight in the first place…I am not able to do either of those things ;).
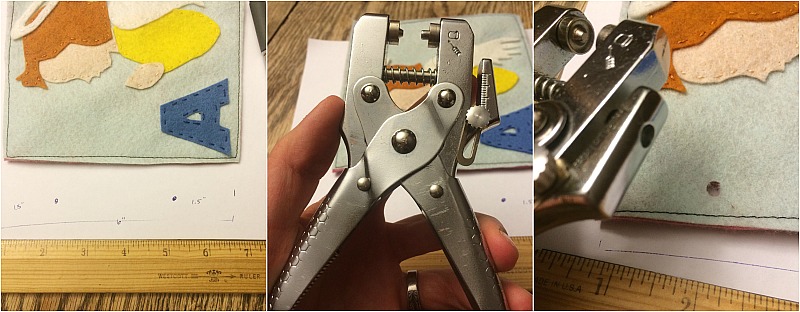
Next up, it’s time to add eyelets to each page.
It is important (especially if you are using the first method to bind your book) that you place the eyelets in the same place on each page.
I used the incredibly accurate method (lie) of measuring equal-distant places on a piece of paper and then used that as a guide for where to mark the felt and then place each eyelet.
This, of course, isn’t super accurate, but I found it to be accurate enough.
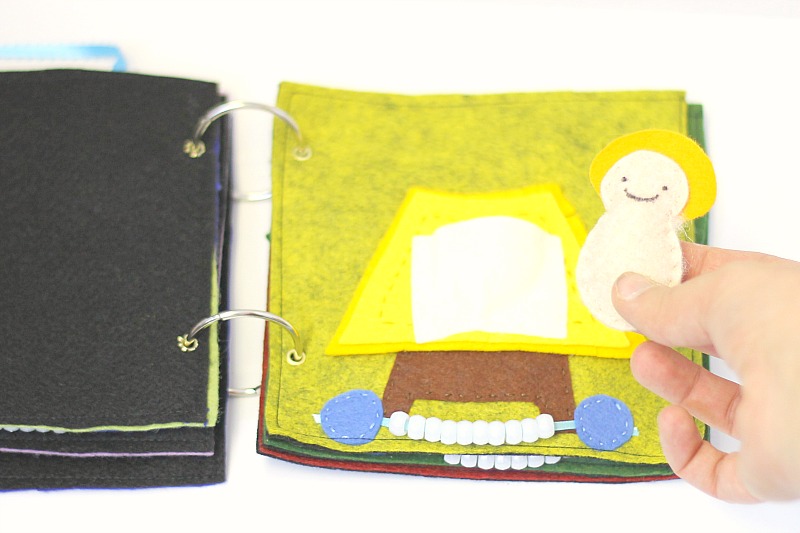
You are moments away from completing the first method of binding!
Once you have all of your eyelets in place, simply grab some metal book rings* (like those in the picture above) and sting all of the pages together.
I used 1.5 diameter rings for my Rosary Book.
Ready for Method 2?
I like to use this method for binding longer felt books and it is a little bit more “book-like”
Place eyelets in all of your pages EXCEPT YOUR FRONT AND BACK COVER.
Also, grab these supplies:
- 2 additional pieces of felt, as long as your cover pieces and as wide as the thickness of your completed felt pages. These pieces will form the spine of your book.
- Thin, sturdy ribbon
- Matching embroidery thread
- Fabri-Tac, or permanent fabric glue
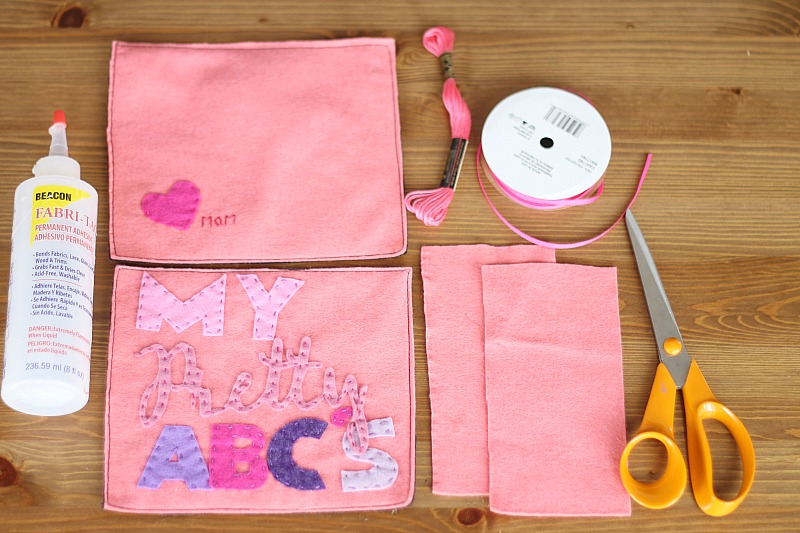
As a first step, cut 2 long pieces of ribbon (Mine were about 3 feet long each.
You can always trim later).
Then, using the fabri-tac, glue these ribbons to one of the spines felt pieces, using a finished page as a guide for where the eyelets are.
Glue the ribbons so that 2/3 of the ribbon is on the left of the spine piece.
Next, cover the felt spine piece with more glue–leaving the edges glue-free–and top with the other felt spine piece.
Trim the top felt spine piece so that it is just slightly smaller than the lower piece. This will help with the stitching in the next step.
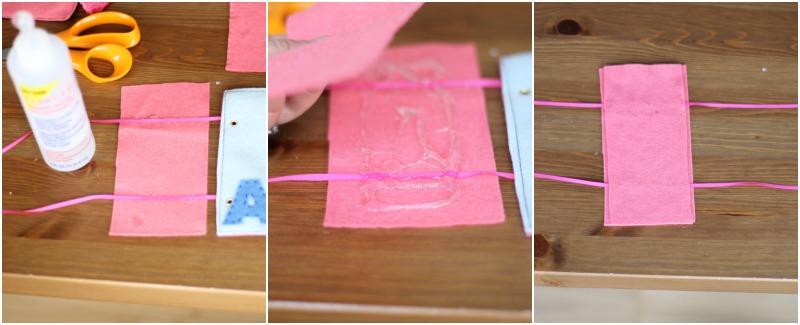
To attach the spine to the front and back cover, fold the ribbon in (don’t stitch through the ribbon), a place with a cover piece, right sides out, and blanket stitch up and down both sides of the spine.
If you need a little help with the blanket stitch, check out this blanket stitch video tutorial I made.
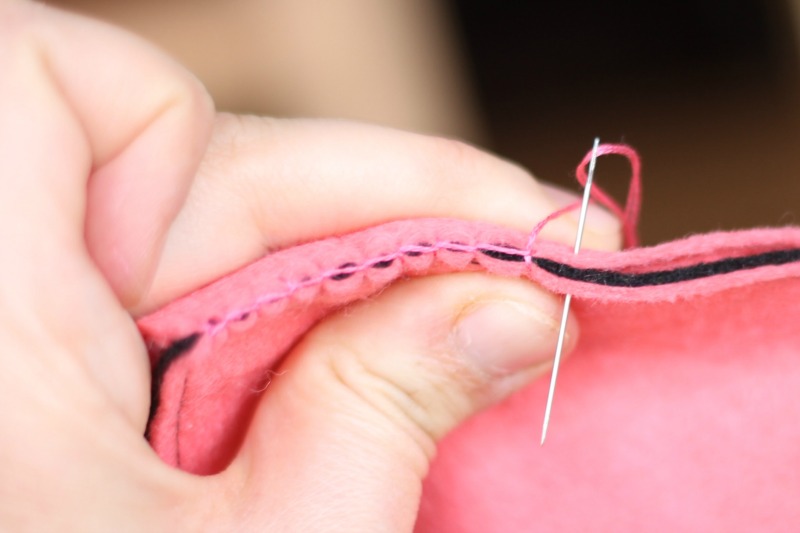
Almost done!
Once the blanket stitch is done, add a little glue between the 2 felt spine pieces, just so that they are perfect together.
Now it’s time to string the pages!
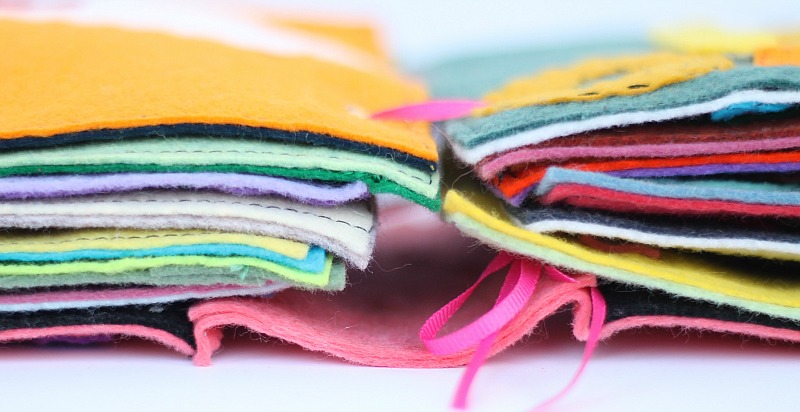
String the pages in a way so that you have both ends of the ribbon at the end of the book.
Simply pull the ribbon tight, tie in 2 pretty bows, and you’re done!
I hope this tutorial was helpful!
The pattern will be coming so very soon.
Stay tuned.
There will be wonderful early bird specials.
And, if you haven’t yet, make sure to sign up for my Newsletter. This is where I send all sorts of deals, free patterns, and love.
All the best

I know this is probably a question you get often. What size are the eyelets that you use
Thank you so much for your tutorial. It helped me decide how to cover my little felt books.
Thank you! =]
Thanks for your sharing details, it’s help me a lot 😘🙏
What size of eyelets did you use?
Love your book and ideas
amazing…..how to make felt paged hard ?
i tried but the pages are so soft and shaky .
Forgot what it’s called but you can get stiffening material from the haberdashery shops. You just lay it the correct side down onto your felt and iron it. It melts the glue and stiffens it perfectly. Trouble is I’m having problem making the holes. Too thick I think 🙁
I used the softer felt. To make my pages…they are flimsy even when i put them together. Any idea how I can make them more sturdy when I out them back to back?
Maybe a piece of cardboard between them?
Gosh. I was hoping to find a way to punch the holes and add grommets (eyelets). What kind of punch did you use? I bought a leather punch but have not tried it yet. How to you add the grommets/eyelets? My book is a quilted one with cartoons for a child. I have on order 5-inch binder rings as my book is quite large.
Thank you so much for sharing. I am trying to make a Italian and English book for a one year old and didn’t know how to go by doing it.
What a cool idea! I’d love to see what you mean by an Italian and English book. Please send me a picture when you’re done!!!
Where did you get the metal book rings?
I got mine on amazon, but you can get them lots of places. They are called book rings.
Thanks!
Thank you so much for this post. I plan to make a busy book and was having trouble starting as I couldn’t decide
how I was going to finish it off. I can now imagine how it will look when finished. I can’t wait to start now! It was also helpful too know that I could back each page with a plain color or with another finished page. Anyway thank you for inspiring me today.
I’m thrilled. Happy creating!
Thank you my dear pleaze can tell me what is the meterial that i need to do this quite book pleaze….
sure! I have a pattern that you can get here: https://www.catholicsprouts.com/2015/03/my-pretty-abcs-ebook.html and it lists all of the materials that you will need!
Thank you for sharing …. 🙂
Great tips, I think I prefer the first way, but also the second can be a good choice.
Thanks for sharing! 🙂
great–best of luck and let me know if you have any questions along the way!