DIY Cabinet Door Bench

I am thrilled that today I have an actual DIY project for you, one that requires saws and wood and physical strength. And, I have to admit, I have a “guest” crafter of sorts who made this wonderful bench, my dear sister Ruth.

Ruth is my older sister, and she is the best older sister there ever could be.
She is the mother of 4 and has number 5 on the way.
Like me, Ruth is big into her projects, but as you can see, her projects are a little more impressive than mine.
In fact, I worry sometimes that she is addicted to DIY projects.
She is slowly making her way through her home remodeling as she goes.
A lot of the left-over supplies from a major remodel she did at her house were used for this bench.
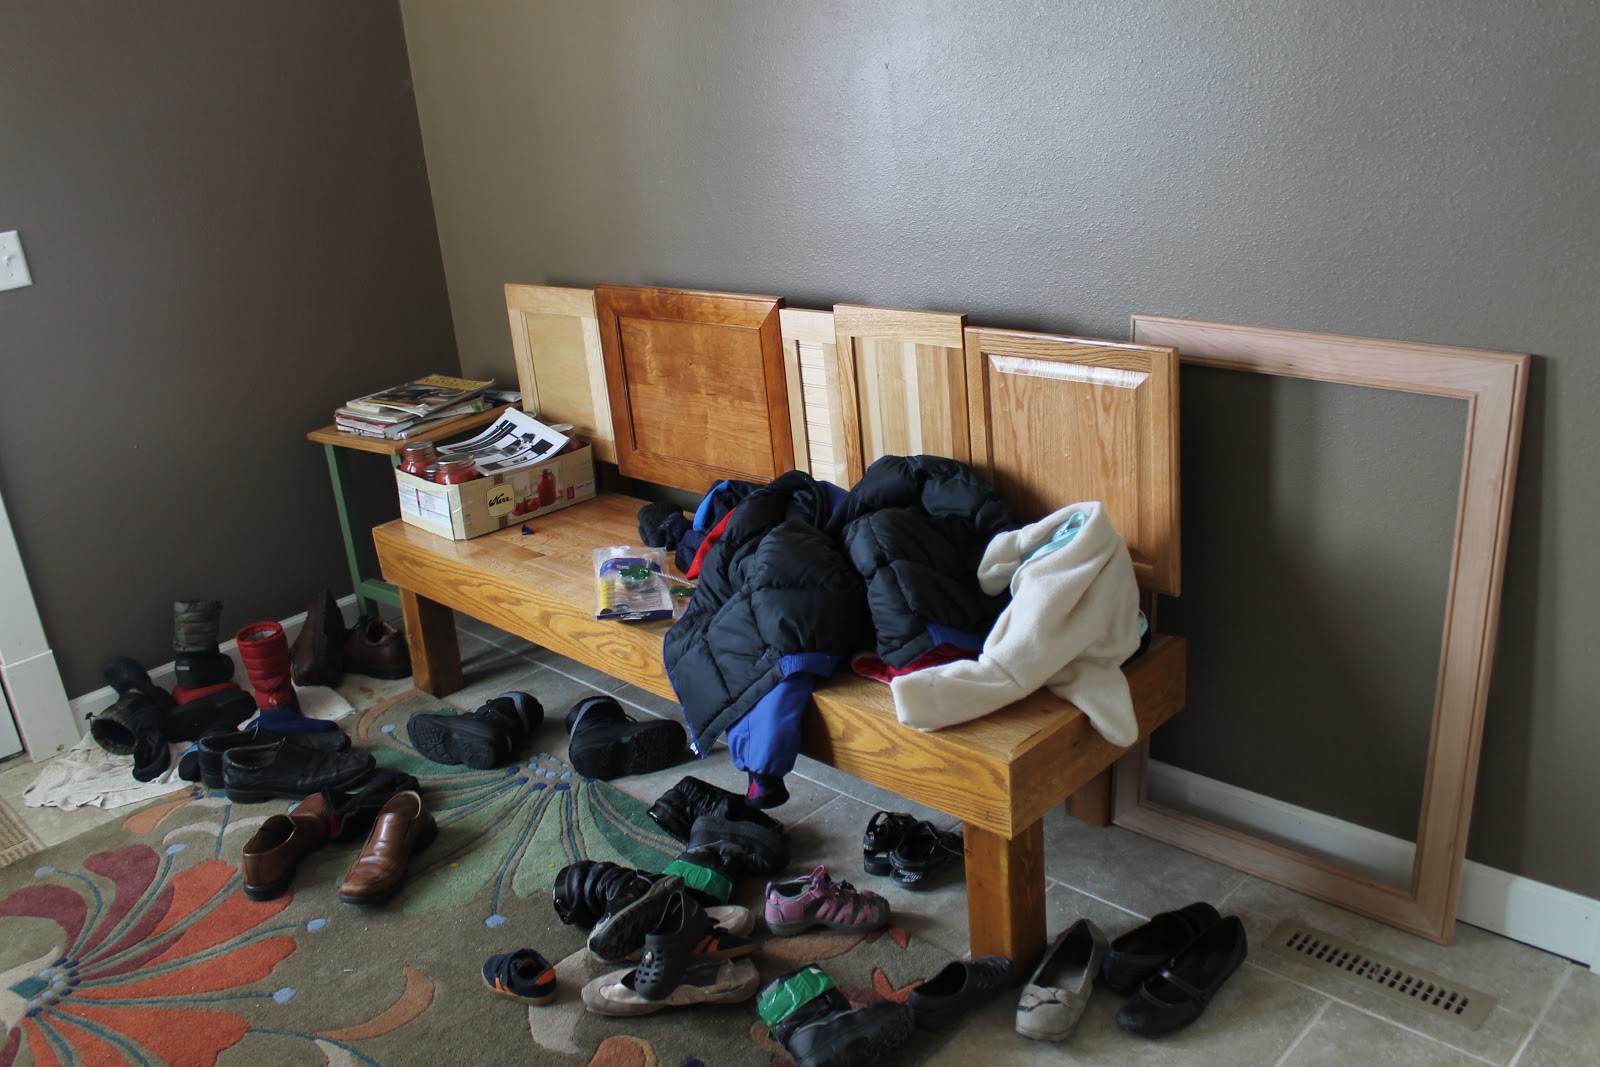
And, isn’t this bench cool?!?
That’s right, the back of the bench is cabinet doors she bought for dirt cheap at a re-use store.
I love this bench that she has in her entryway (which is part of their recent addition).
In case you too are a major DIY-er, here is the how-to:
Supplies:
- Cabinet Doors
- Lumber–Ruth used a variety of sizes, 4×4’s and 1×4’s, she just used what she had around
- Plywood
- Polyurethane
- Saws
- Air gun/nails
- Wood Flooring
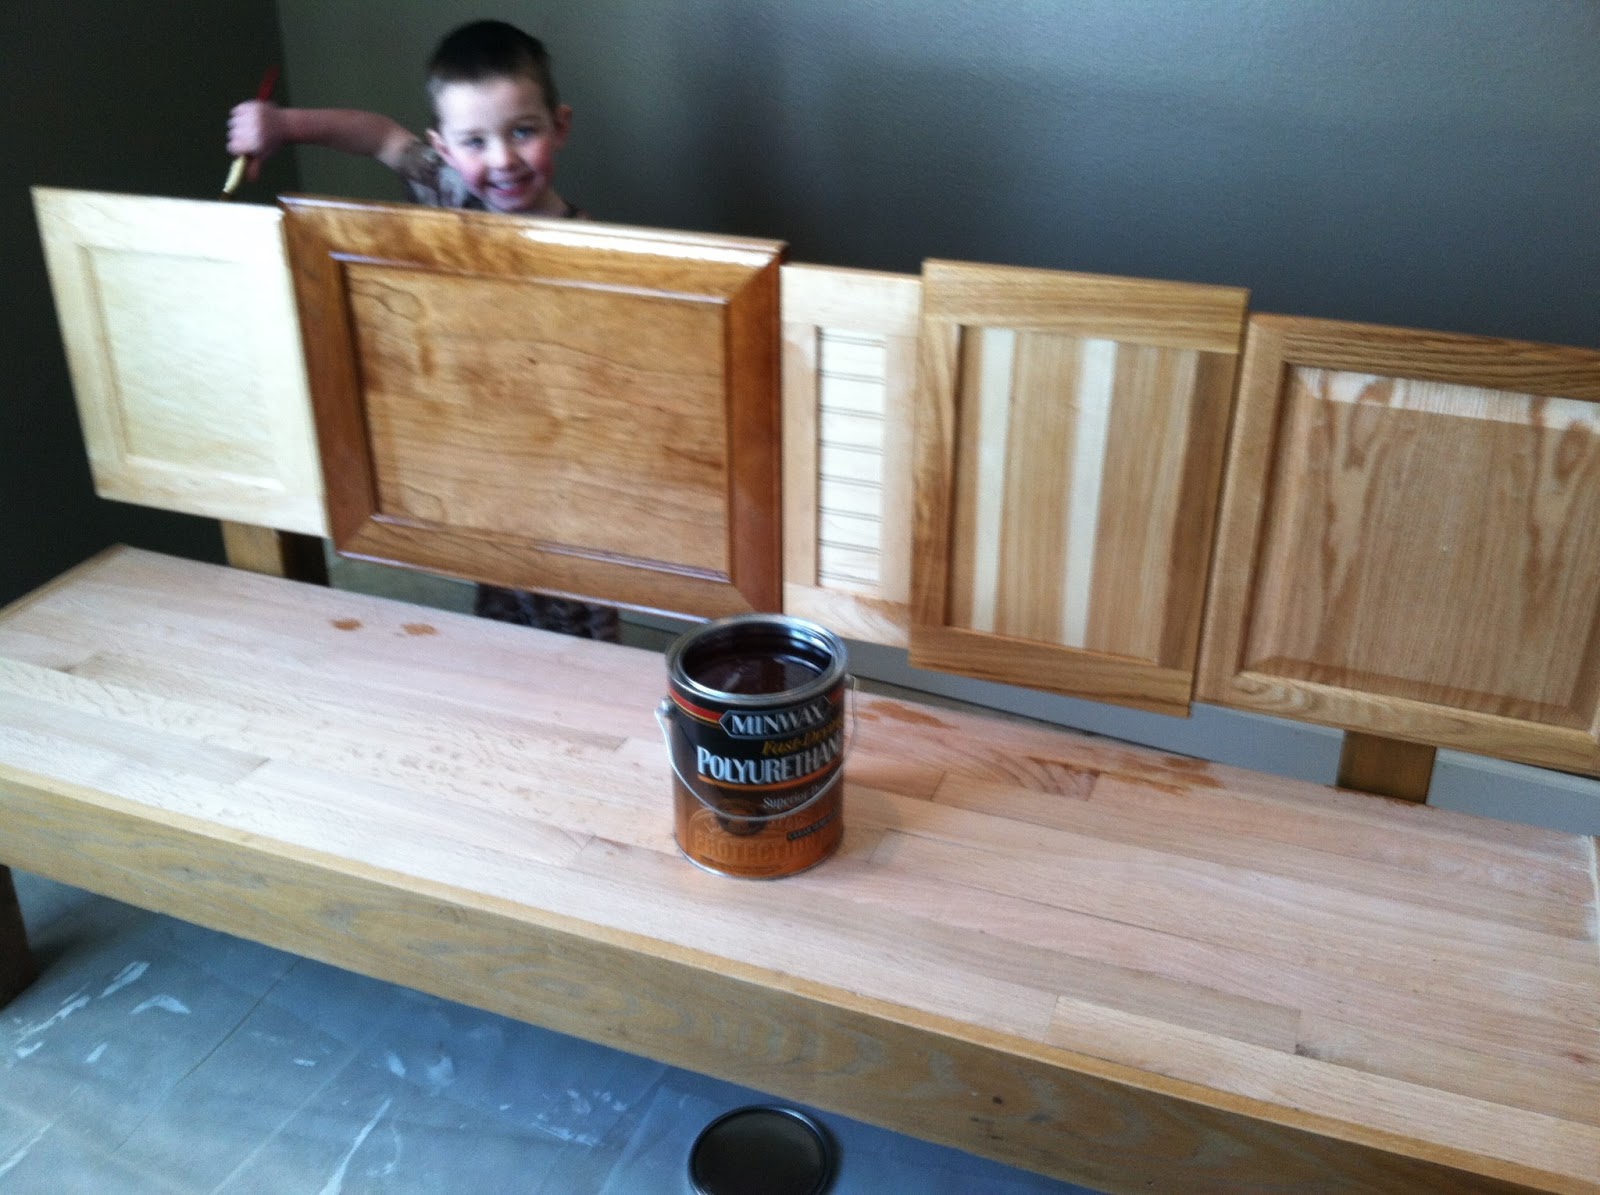
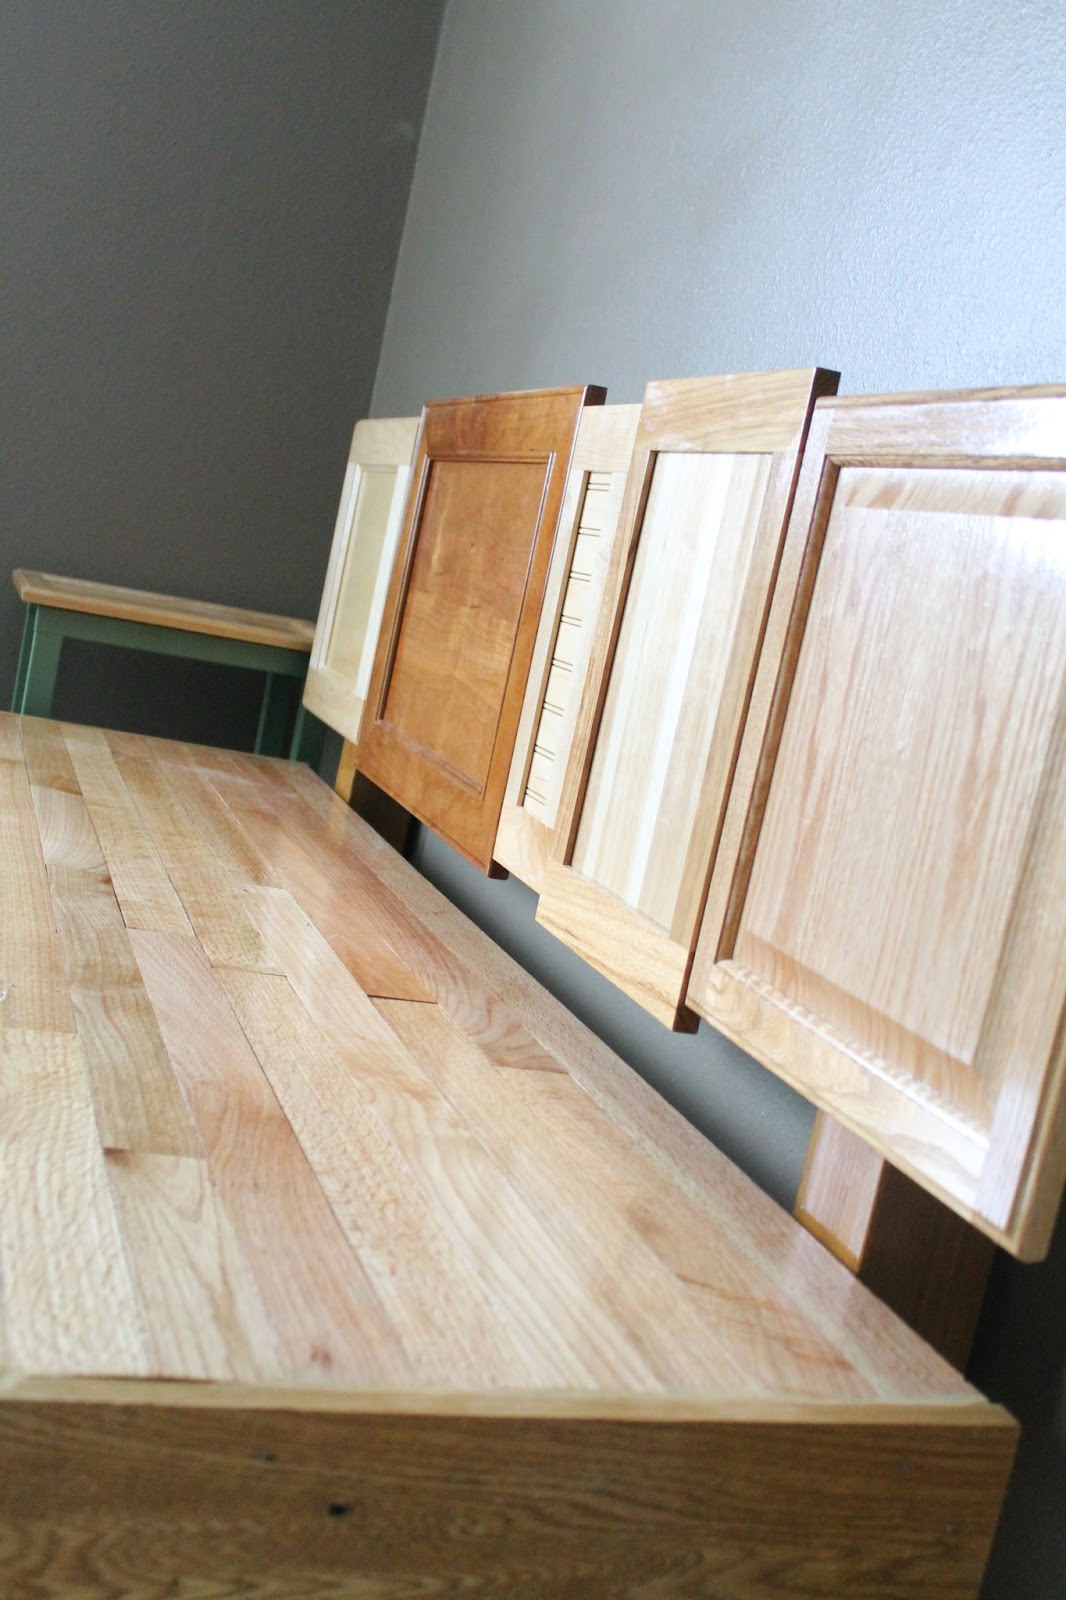
Step 1: After gathering all the supplies, the first thing Ruth did was lay out the cabinet doors she’d be using for the back of the bench.
She purposely chose a rich variety of styles and woods. From left to right the cabinets are Maple, Cherry, Maple, Hickory, and Oak. She backed the cabinet doors with a piece of plywood.

Now, this is true creativity.
And it’s functional!

I am so glad that my sister isn’t a blogger and that I get to share this project with you!
Thanks for being here,

What an amazing idea and how well it returned out. Great work! That’s one fantastic piece of furniture!
That is so cool! I love it! couldn’t have ever thought about that!
[…] Ruth is back to do a little bit more of the heavy lifting around here. Last week I showed off her first cabinet door bench…and guess what, she made TWO. I know, I am humbled by her ability and get-up-and-go too! […]
[…] to share her major DIY accomplishments. She is amazing. Check out her other projects here and here. Despite the fact that she is pregnant (expecting around Halloween) and already has 4 children, […]
That’s fabulous!! What a unique and fun idea. Had to pin it … thanks!
Wow, I can really see this as a platform bed. This is beautiful. Thanks for the idea!!
CONGRATS!!!
You have been featured at The DIY Dreamer. Come on over and grab your featured button, you deserve it!
http://thediydreamer.com/from-dream-to-reality/features-64/
Don’t forget to come by this evening to link up again 🙂
That’s so cool! I love it!
Wow, Nancy, this is such a clever idea…and it turned out beautifully!
that is really cool, would never have thought of that!