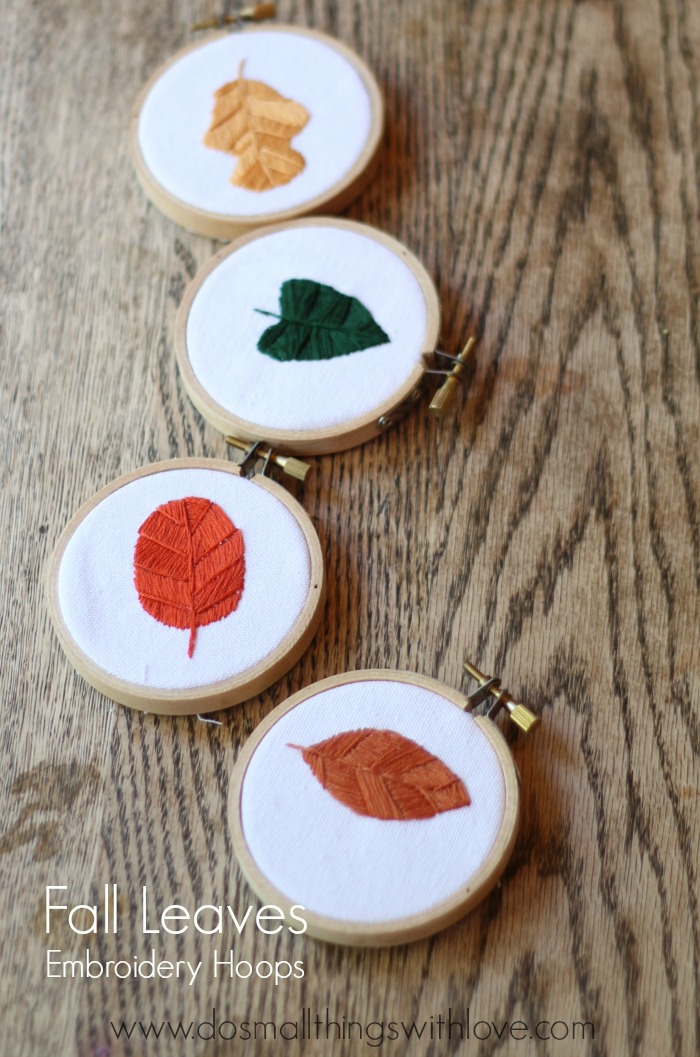
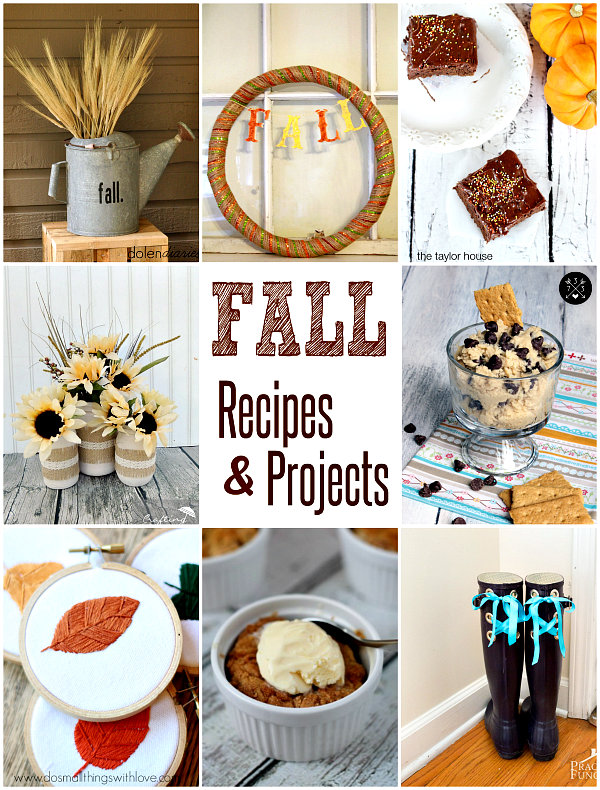
Fall Leaves Embroidery Hoop Art
Well, all of a sudden it’s fall here.
2 weeks ago we were sweating and miserable, and now I am dressing the kids in winter coats.
What happened? I guess that’s just life in Minnesota.
Although I am (admittedly) throwing myself a where-did-summer-go pity party I am trying to get excited about fall–and my favorite part of fall is color.
Few places on earth do the fall colors as good as Minnesota.
This was my inspiration and starting point for my latest embroidery project: Fall Leaves Embroidery Hoops.
This is a simple project that requires very little in terms of supplies and even littler in terms of embroidery skill.
Seriously, even you can make these, easily!
And, really, I just have to say that I really love this project because of these adorable tiny embroidery hoops.
Aren’t they awesome!
They are on 3″ embroidery hoops and I ordered them from Consumer Crafts.
And, I have plans for them. I have been planning all of the Christmas Ornaments I’m going to make with them.
It’s not too early to be crafting for Christmas, is it?
Want to make your own? Great! Here’s how to:
Supplies:
- 3″ Embroidery Hoops
- Heavy White Canvas Material
- Water Soluble Maker
- Embroidery Thread, Needle, Scissors
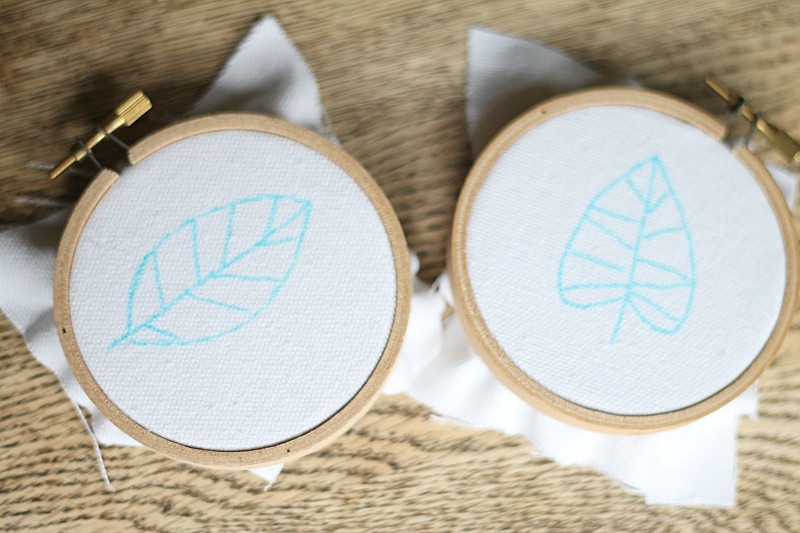
First off, take your water-soluble marker and draw some leaves, small enough to fit inside of a 3″ hoop.
I decided to draw leaves that are “folk-art” in style.
I decided this because they are easier to draw–and stitch–and I like all things folk art.
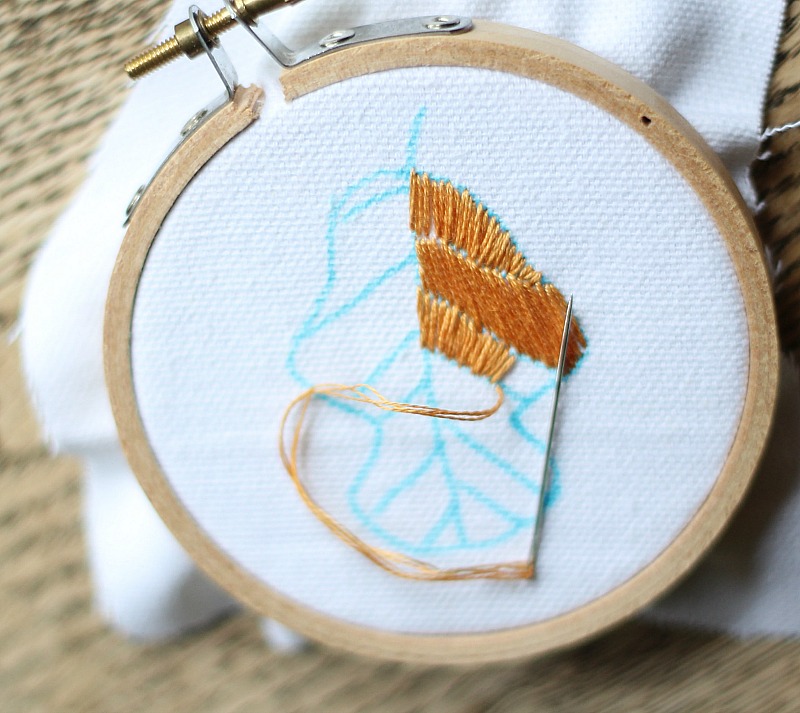
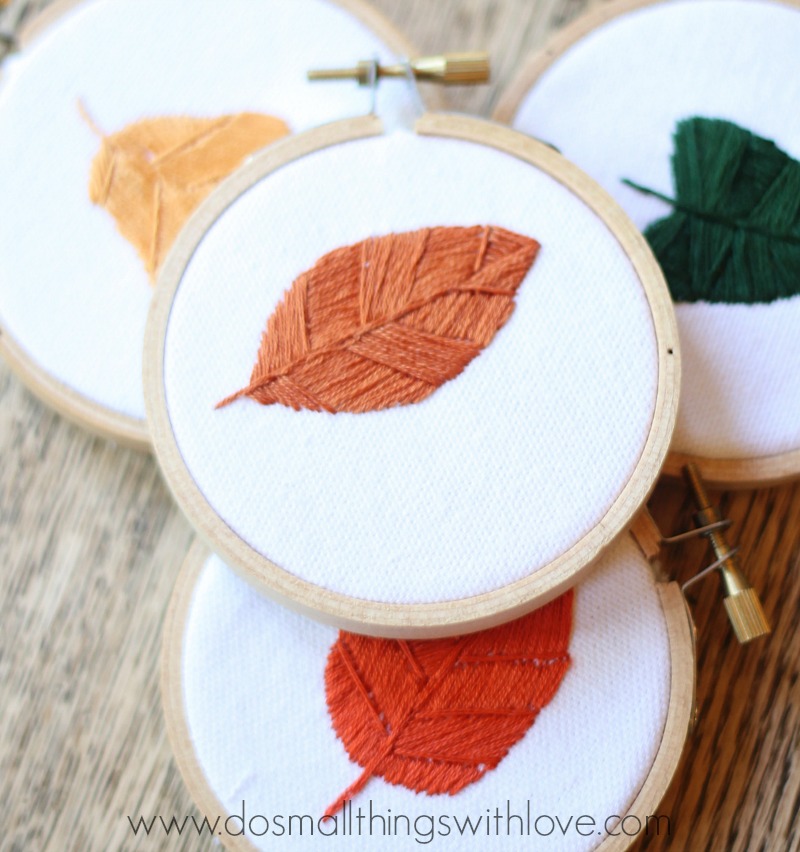
Next, start stitching. The main stitch in this project is a satin stitch.
A satin stitch is, essentially, simply a long stitch that stretches from one side of an area to another, which you repeat until an entire area is completely filled.
I really love satin stitch and have used it in SEVERAL projects.
Satin stitch really allows you to show off beautiful embroidery thread colors.
Since I drew leaves to veins I had several smaller areas in each leaf.
I satin stitched each of these areas, making sure that my stitches were going in a different direction than a neighboring section.
When the satin stitching was done, I did a few long stitches to further separate the areas.
Finally, take each leaf out of the hoop and submerge it in water.
This will erase the lines you drew in step on. When dry, put the fabric back into the hoops and trim excess fabric.

Yup, I love the colors of fall!
And, if you are in a fall sort of mood too, here are some other project ideas for you:

Lovely creativity. I haven’t tried stitching from last few months. Now, I’ll definitely give a try. Thank you so much for the article!
[…] This will be a great way to add fun and colors to fabric items. Peek into details of these embroidered fall leaves that will make a great art piece. Full tutorial here catholicsprouts […]
[…] This will be a great way to add fun and colors to fabric items. Peek into details of these embroidered fall leaves that will make a great art piece. Full tutorial here catholicsprouts […]
[…] Dies ist eine großartige Möglichkeit, um Stoffartikeln Spaß und Schimmer zu verleihen. Schauen Sie sich die Einzelheiten dieser gestickten Herbstblätter an, die zu einem großartigen Kunstwerk werden. Vollständiges Tutorial hier katholische Sprossen […]
[…] Dies ist eine großartige Möglichkeit, um Stoffartikeln Spaß und Farbe zu verleihen. Schauen Sie sich die Details dieser gestickten Herbstblätter an, die zu einem großartigen Kunstwerk werden. Vollständiges Tutorial hier katholische Sprossen […]
Love the choice of your pattern Dragons Embroidery Designs
Such a great fall stitchery project! I’ll be sharing it on The Crafty Crow soon 🙂
thank you so much! I’ll look for it!
[…] You can read more about Fall Leaves Embroidery Hoops HERE. […]
[…] https://www.catholicsprouts.com/2014/09/fall-leaves-embroidery-hoop-art.html […]
[…] https://www.catholicsprouts.com/2014/09/fall-leaves-embroidery-hoop-art.html […]
I haven’t embroidered in years. This certainly inspires me to pull out the thread and hoops. Thanks for sharing.
Oh wow these are so sweet! I’ve never tried stitching like this – I did some cross stitching when I was a kid but I really should give this a go sometime. I’d love to do something like this on clothing too.
I always love a good stitching project! This looks like the perfect way to ring in autumn, especially if done with a hot cup of tea 🙂
These are adorable–and the stitching on them is perfect!
My stitching perfect? you are too sweet!
These are so stinking cute! I love it.
Anything in a tiny embroidery hoop is cute, I think!
So cute! I love these!
Thanks Chrissy!