Felt Owl Coin Purse (with hidden closure)
Okay, prepare yourselves.
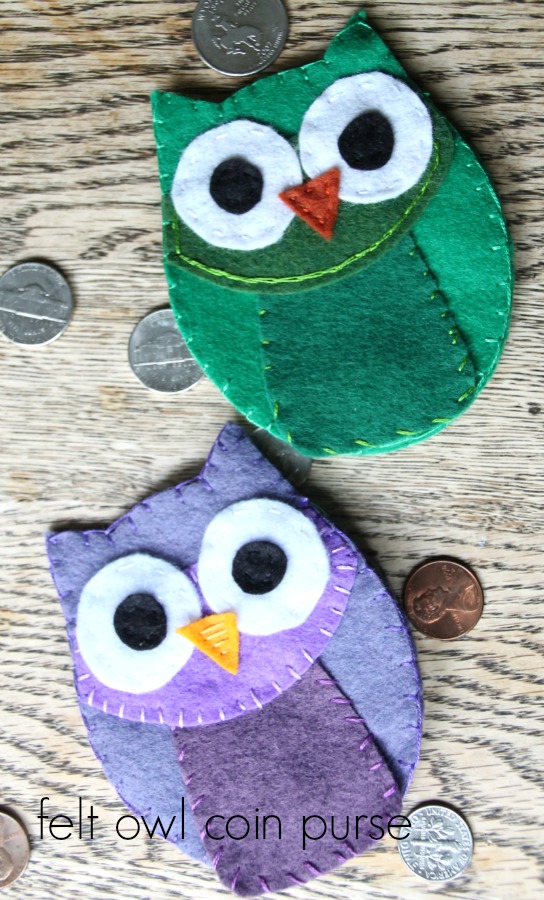
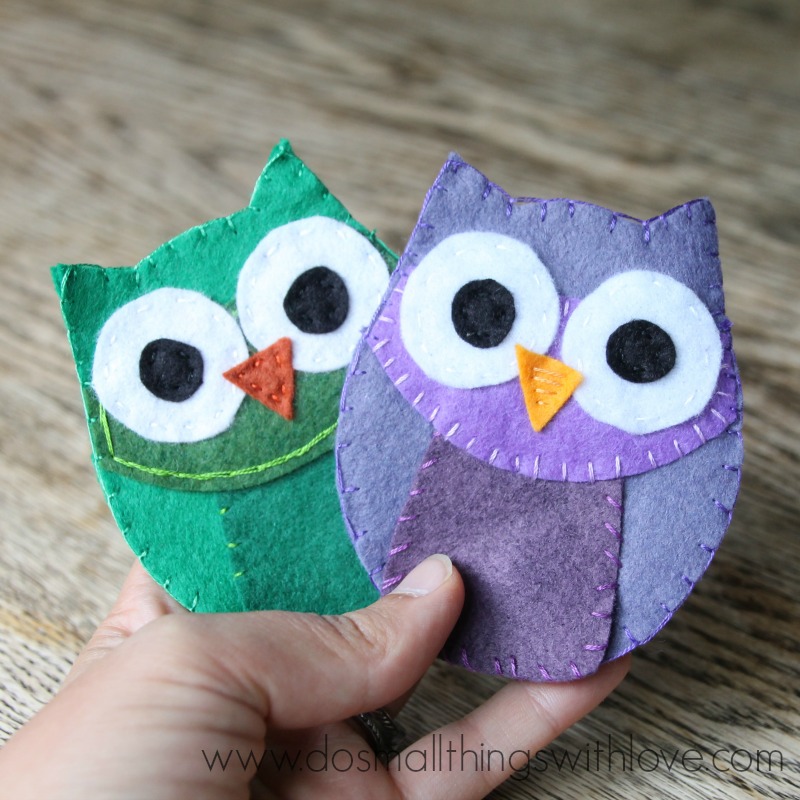
Today’s project–Felt Owl Coin Purse with Hidden Closure–is so cute that it might actually overwhelm you if you aren’t ready.
I mean really, aren’t they cute?
I’m a little obsessed with these little guys.
After I stitched them up I actually turned to my husband and squealed, demanding “aren’t they the cutest?” He nodded.
Clearly, his excitement over these little felt owl coin purses wasn’t quite the same.
Oh well, his loss!
If you are in love with these guys too then it’s time to get to work making your own.
This is actually a very simple project that even a casual embroiderer can accomplish.
Seriously, you could make this!
All you need are few supplies and a little bit of time.
So, print out the template, and let’s get started!
To make your own felt owl coin purse you will need the following supplies:
- TEMPLATE
- Felt in a variety of colors. I use 100% wool felt, but this is a bit expensive. Craft felt will work as well.
- Clear packing tape
- Embroidery Thread and Needle
- Button

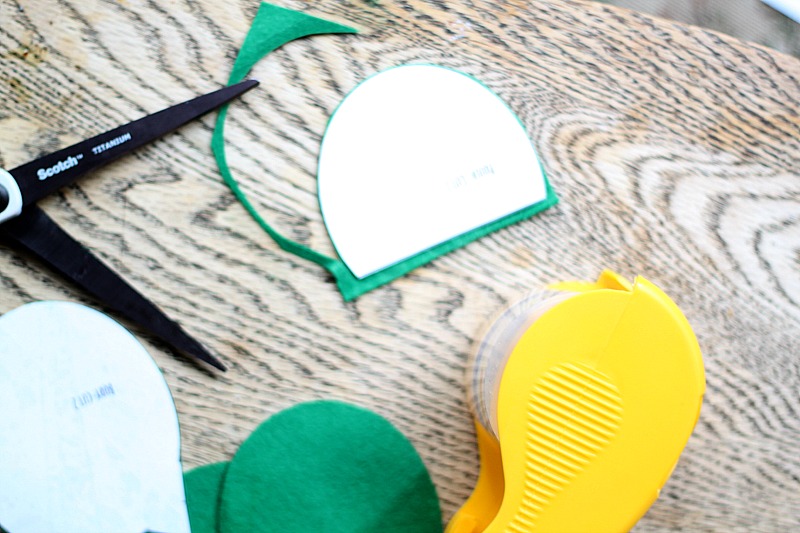
First off use the template to cut the necessary pieces of felt.
You will need one of every shape included on the template, but two of the full-body shape.
And, here is my super awesome felt cutting tip—USE PACKING TAPE.
Seriously, forget the straight pins and use clear packing tape.
This way you will get a precise cut.
Simply tape the pattern directly to the felt and cut around it.
Try it.
Once you use this method to cut felt you will never go back to pins.
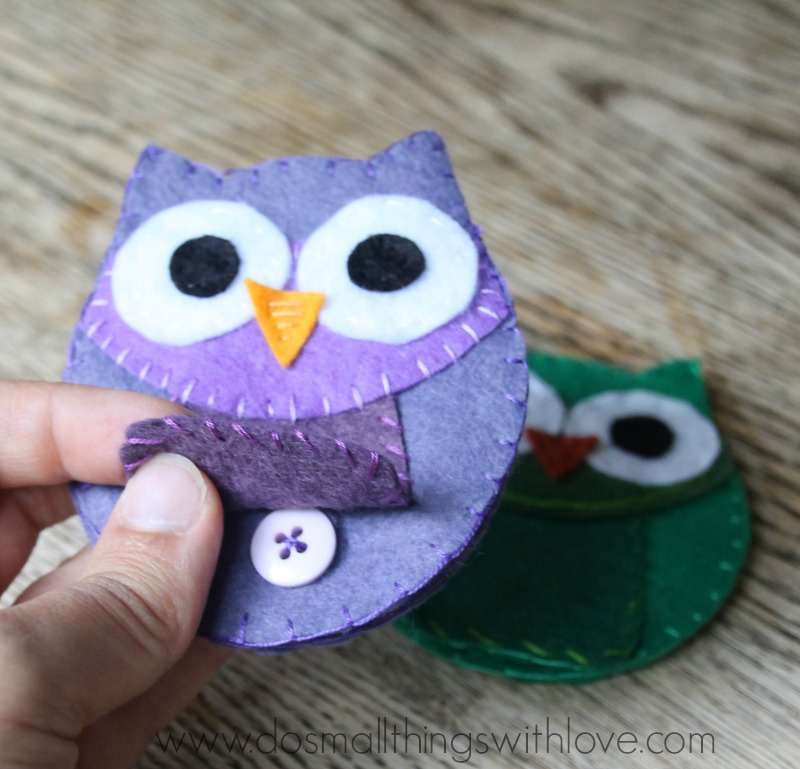
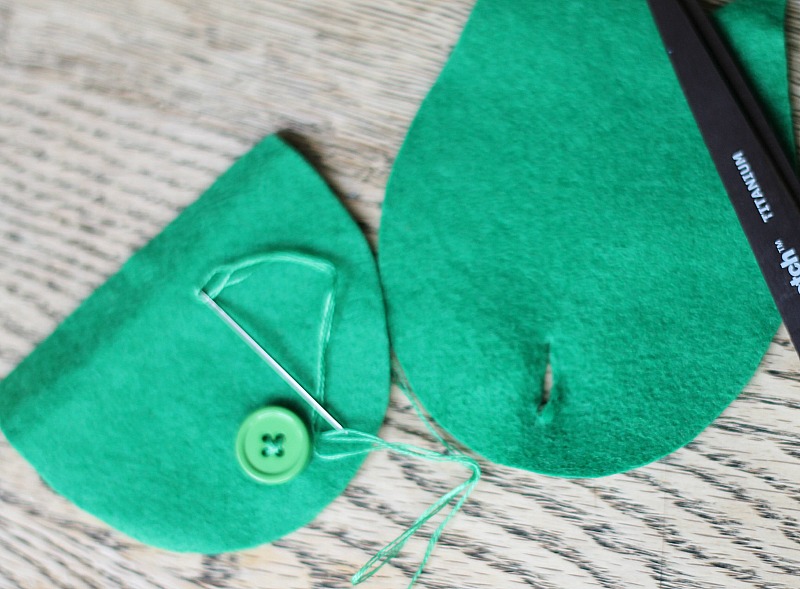
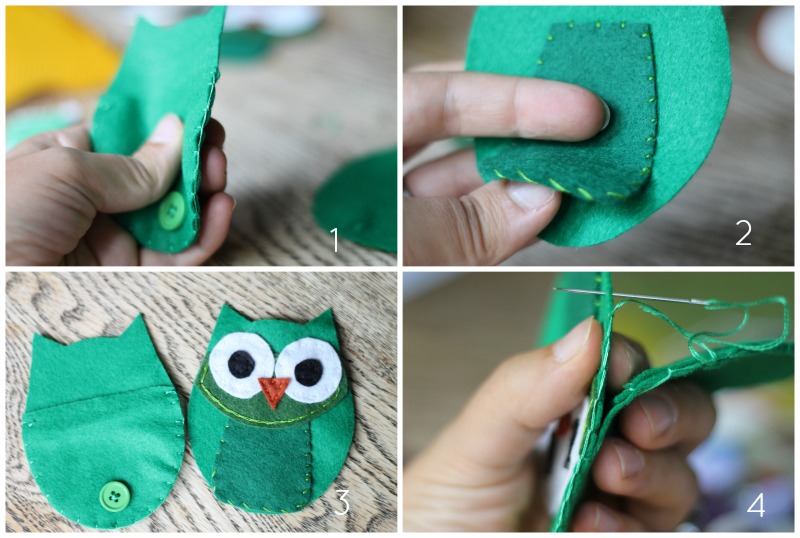
Once you have all of your pieces cut it is time to work on the hidden closure in this coin purse.
Take the pouch piece and sew a button onto the bottom center.
Then, lay one of the full-body pieces (the one you will use as the front piece) on top of it and cut a corresponding buttonhole in the bottom center.
Make sure the button will fit through the hole.
No worries if your buttonhole isn’t perfect–it will be concealed.
And now it’s time to get stitching!
Grab some embroidery thread and a needle and let’s get to it!
1. First, blanket stitch the pouch to the back body piece. Start at the top of one side of the pouch and stitch clear around to the other side.
2. Take your front body piece (the one with the buttonhole) and stitch on the “tummy feathers” piece so that it is centered, but reaches the bottom of the body. Now this is important, this piece will cover your buttonhole but you still want to have access to it, so leave the bottom 1/3 unstitched. To better conceal it I simply whip-stitched around the remainder of the “tummy feathers” piece.
3. Stitch on the “Head Feathers”, “eyes”, and “beak” pieces as pictured using whatever stitch you desire.
4. And finally, connect the front and back body pieces. Since this is a pouch you only want these pieces to be connected at the top. Start your blanket stitch at the corner of the eyes and stitch around the top of the head. When you reach the opposite eye continue the blanket stitch, but only on the top body piece.
Ta-Da! Holy cuteness, right?
I am really in love with these little owl friends and I almost guarantee you that some special little girls in my life will be finding them in their stockings this Christmas!
And I hope that everything made sense in this tutorial (please, let me know if I need to clarify anything).
I also hope that you will give this little felt and embroidery project a try.
However, I have to warn you–once you get into creating things with felt and thread it can quickly become an addiction–especially when the projects turn out this cute!

And, if you are hungry for some more fun felt birdie cuteness, try these—
Fall Felt Owl Coin Purses— —Felt Owl Pouch {with free template}— —Another Felt Birdie
Thanks! And, I’d love to connect with you on my blog, Facebook or Pinterest.
All the best!

[…] Owl Coin Purse with Hidden Closure from Do Small Things with Love […]
I love the story and I would be telling my husband to look too, they are so cute. thank you and GOD bless